In this post, we’ll concentrate on getting data from sensors and making it available for anyone else to consume. In my case, I used sensors with Node MCU board from Amica.
Node MCU
Node MCU is a low cost micro-controller chip with built in Wifi. This unit basically runs on ESP8266 chip which has built in Wifi. Total storage available on chip is 4 MB so your compiled code can be as large as 4 MB. This simple board has 16 General Purpose I/O (GPIO) pins and one 10 bit ADC to read analog data. So basically this small unit packs a lot of punch if you ask me. Except for just one Analog input pin, this board is a solid one. In my case I needed one GPIO pin to read data from DHT 11 sensor and one analog pin to read data from soil moisture sensor.
Node MCU can be programmed by LUA scripts as supported out of box, however developers have also added support to use and code NodeMCU using Arduino IDE. Since I was familiar with Arduino IDE, I found this very convenient to use. If you want to setup Node MCU support on Arduino IDE, I suggest you follow steps provided on their GitHub page – https://github.com/esp8266/Arduino#installing-with-boards-manager
In order to load program onto Node MCU, just like Arduino, you have to connect Node MCU board to your computer and transfer code over serial port. Now I am using Mac Book for all my trials so I downloaded and installed USB to Serial driver from SILabs from here – http://www.silabs.com/products/development-tools/software/usb-to-uart-bridge-vcp-drivers
Once these drivers are setup and you connect Node MCU with your Computer / Laptop, you’ll be able to try out ESP 8266 examples available out of box. Since now Arduino IDE and Node MCU is setup, lets move on to sensors used –
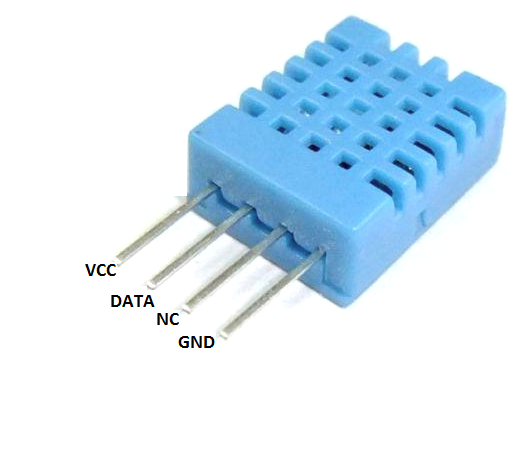
DHT 11
DHT 11 is a basic ultra low cost temperature and humidity sensor. This sensor’s technology ensures high reliability and log-term stability. Sensor itself provides a digital output directly on one of its pins. Sensor’s operating power supply range is from 2.2 V – 5V.
You just have to connect DATA pin of this sensor to any GPIO pin on Node MCU board, you also need library installed on Arduino IDE. Now there are many versions of this library and I had some difficult time to choose which one to go with since it was to work with Node MCU. Let me save you trouble – I used version 1.3.0 of library https://github.com/adafruit/DHT-sensor-library/releases. You can download 1.3.0 version from link above and install it in Arduino IDE.
This single library allows you to read both temperature and humidity from DHT 11 as well as DHT 22 sensors.
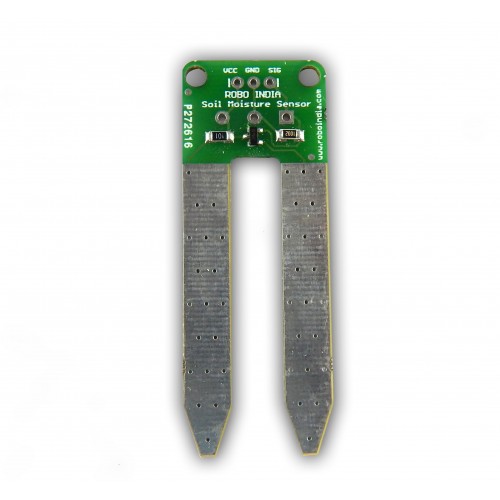
Soil Moisture Sensor
For measuring soil moisture, I bought sensor from RoboIndia – https://roboindia.com/store/soil-moisture-sensor
This sensor provided analog value from 0 – 1023. Instruction to use were very simple – there are no instructions 🙂 I just pugged it in and started reading analog values from Node MCU. Being analog sensor, there is a need to make sure it works fine so as part of basic calibration, I tested sensor values for completely dry condition (value of less than 10) to complete moisture by dipping sensor into water (Value was 1023).
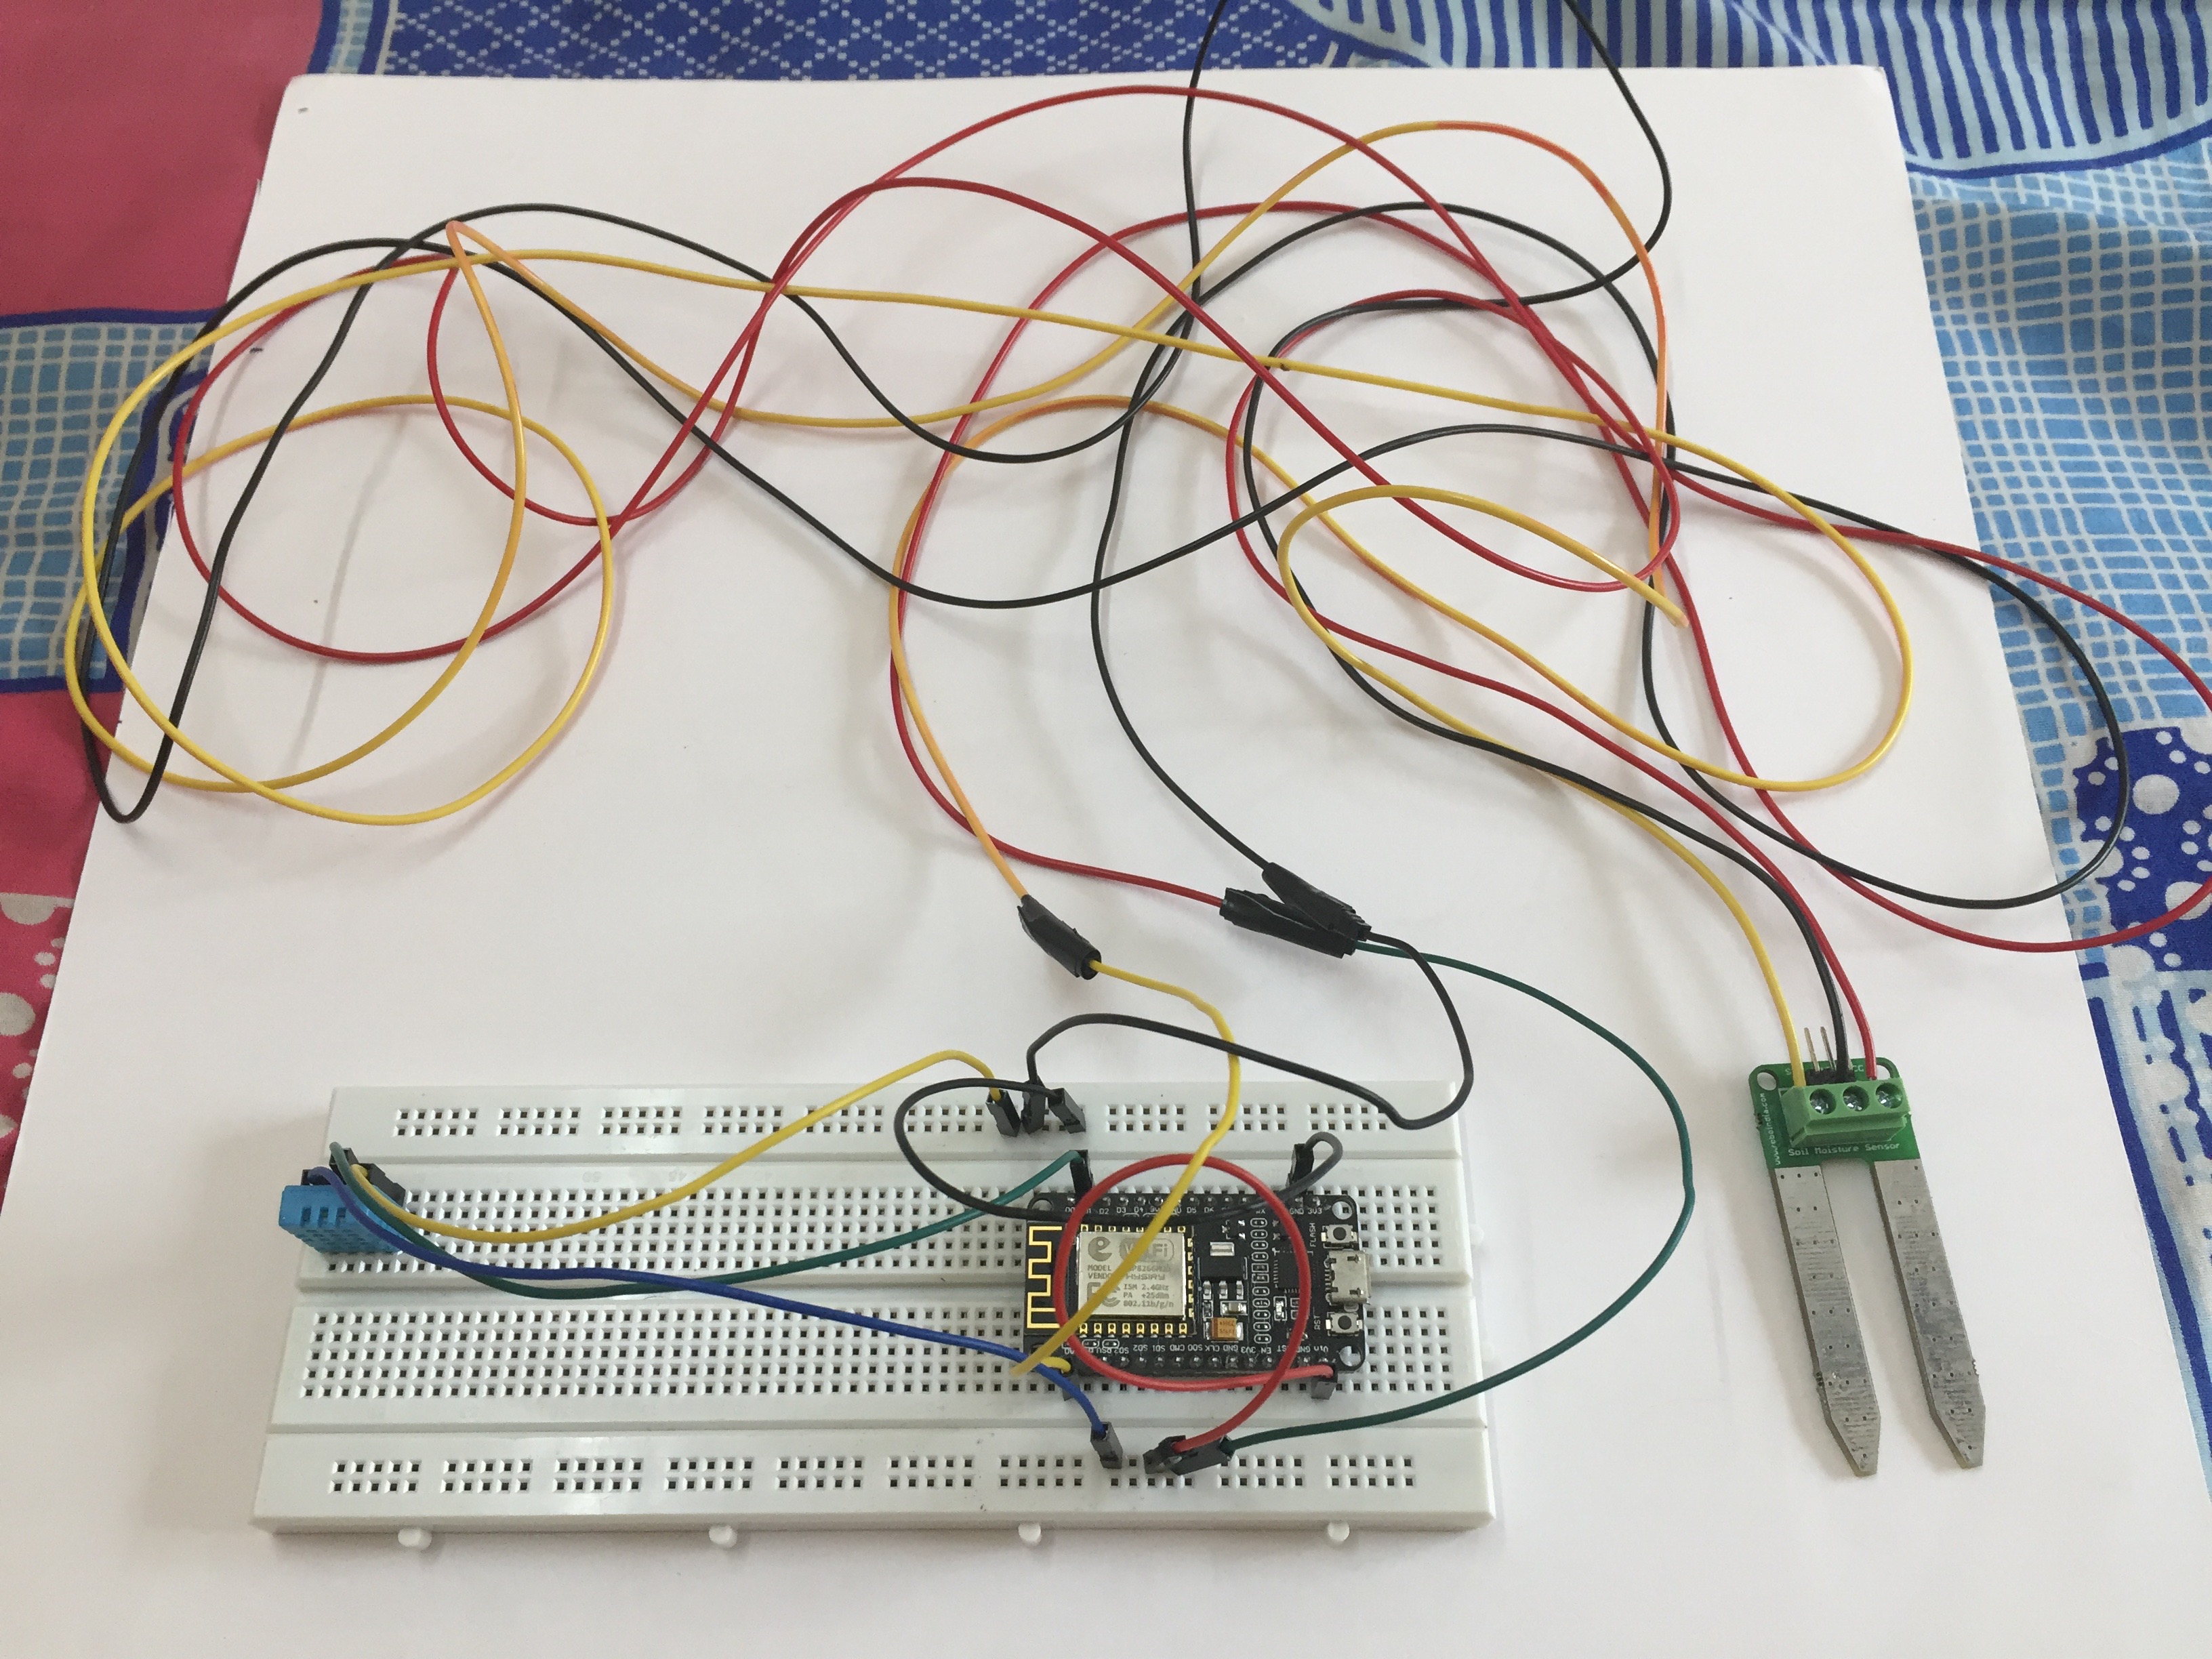
Now that we know our sensors, lets go to part where they start talking to Node MCU. Following diagram shows how sensors are connected to Node MCU:
Interconnections are pretty simple:
Data Pin of DHT11 -> D1 (GOIP 5) Pin on Node MCU
VCC, GND of DHT 11 -> Vin and GND of Node MCU
Analog 0 Pin of Soil Moisture Sensor -> A0 Pin of Node MCU
With this interconnections and DHT library now I was ready to write code and make sensor and Node MCU talk to each other as follows:
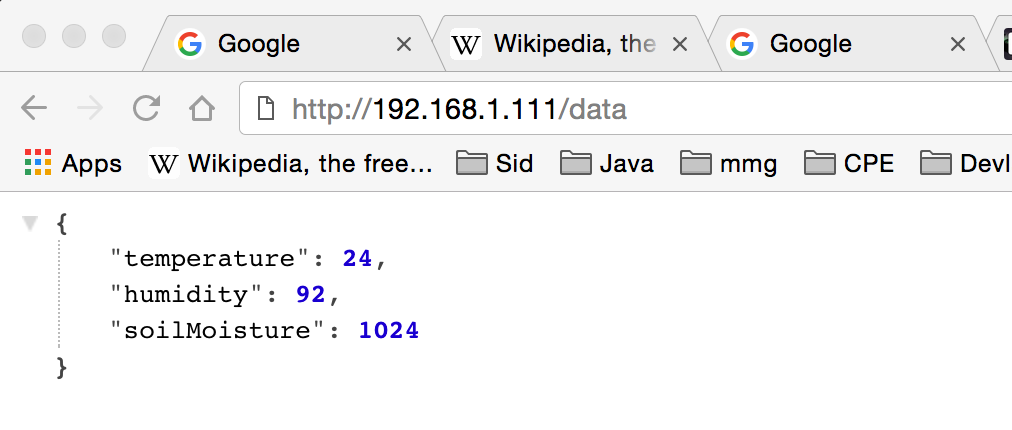
We read data from DHT 11 using library, we read data from soil moisture sensor as analog input (value is just an integer between 0 and 1023). We make data available over HTTP Server as json content. All of this code is just over 100 lines of code, I’ve shared it all on GitHub –
https://github.com/sidgod/garden-data-collector
Once this code is compiled and pushed into Node MCU over USB->UART, you can access sensor values on browser like this:
This is where first part of work is done. Now we are able to read data from sensors and make it available over Wifi for anyone else to consume. Next we tackle how to read this data and forward it to AWS …